by R.G. Sparber
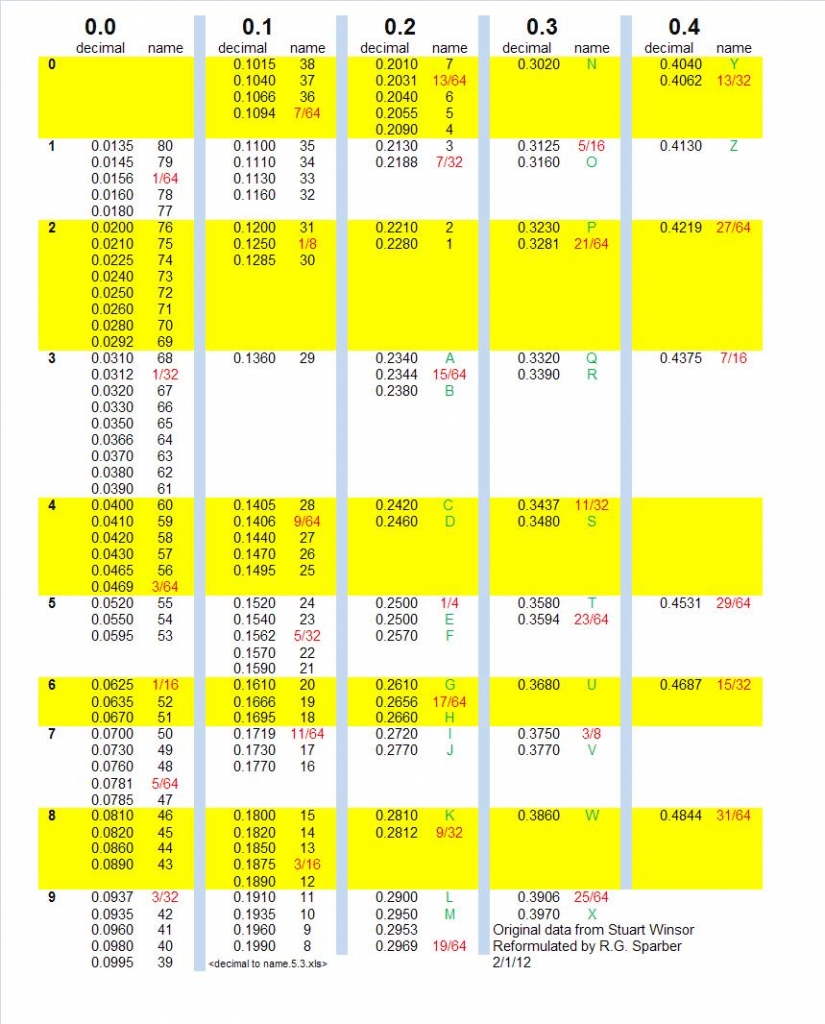
I get one of three reactions from people who see this new drill table format. Some say they hate it, some ask why I bothered, and some really like it. The basic idea was to be able to start with a needed hole diameter and use it to find the closest number, letter, or fractional drill size.
To use the table, you use the first digit to the right of the decimal to select a column from the table. Then you use the second digit to the right of the decimal to select a group of rows. Where these two intersect is the group of drill values that start with the selected numbers. I find it much quicker than scanning down a long list of values.
For example, say I want to drill a hole that is 0.245″ in diameter. I use the “0.2” to select the right column. Then I use the “4” to select the right group of rows. At that intersection, I see two entries: “0.2420 C” and “0.2460 D”. So, in less than two seconds, I found the drills closest to what I wanted.
If you wish to print this table out, there are two choices. You can just print it out on your home printer or you can send it to Walgreen’s Photo. The table has been sized to print out as a “true digital” photo, which is 4″ x 5.3″. The photo printers at Walgreen’s are very high resolution which means that your table will come out crisp and clear.
It is then a simple matter of laminating the card. I use the cold lamination process, which places sticky clear pieces of plastic down on both sides of the photo to seal it in. You can also use hot laminating to fuse plastic around the artwork.
You can download the chart photo file by going to the downloads section of Machinist’s Workshop’s website.
Thanks R.G. Your subscription has been extended by an issue!
Please do us a tremendous favor and share this tip with your machining friends!


