
by Don Wiederhold
I’ve seen many versions of carriage stops and I’m not going into detail on how to build one, as the many versions on different lathes require a clamping method to fit your specific lathe. However, I do have some features for you to consider when you make your own stop for your lathe.
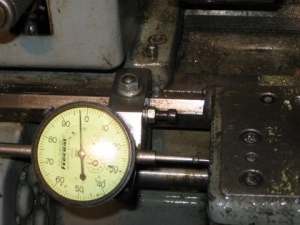
I used to have a stop that had an indicator mounted in a flat plane. The problem with this is hot chips land on the bezel and melt burn spots into the plastic. To lessen the chance of chips sticking to the dial face, I positioned the dial at a 45°angle (Photo 1).
The second feature on my stop was to make it so I could quickly reposition it. I accomplished this by using a cam lever (Photo 2).
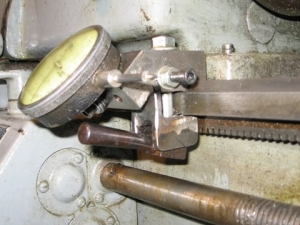
My next feature was a solid stop I could adjust that prevented the indicator rod from bottoming out and possibly being damaged.
In order to work over a wide range, I made a set of measuring rods out of 1/4” diameter low-carbon steel in increasing 1” increments; the longest being 6”. I stamped the corresponding length on each one.
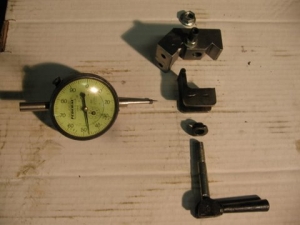
Not every design works out the first time. In Photo 3 you can see two tapped holes to attach the indicator. I designed the stop while I had the three-jaw chuck on the lathe. I went to use the lathe with a collet in the spindle and found I couldn’t get the indicator back far enough, thus the alteration to the stop and the second tapped hole.
Thanks Don! Your subscription has been extended by an issue!
Please do us a tremendous favor and share this tip with your machining friends!